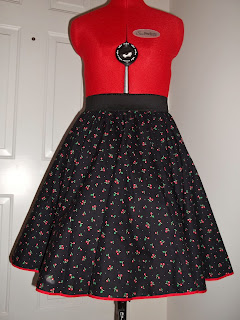
Monday, February 27, 2012

Bows & Bibles

yes, i've been slacking in posting about my latest projects.  this bowtie i actually made probably 3 weeks ago, while the bible cover i made more recently.  so now i've taken a break from taking a break to post the projects. :)  so, the bowtie.  i got a special request from a girl i know who wanted a red bowtie for her 2-year old little boy.  i had never made a bowtie before, but figured it wouldn't be difficult.  so i did some research on Pinterest and found this easy tutorial on papernstitch blog...and what was even more awesome is that the tutorial was made using measurements for a 2-year old boy!
as you can see it turned out fabulously, and i'm sure i will be getting more requests from her!

next up....my mom's bible cover.
my mom recently bought a new bible, which is bigger than most bibles, so she needed a new cover.  i thought it would be awesome to make her one so i did some research and found a great tutorial from Tracy's Treasury.  my original plan was to follow her exactly, but i couldn't find a zipper long enough so i had to improvise.  also, instead of having fabric cut from a bolt i bought 1 fabric quarter for the outside and 2 fabric quarters for the inside.  i also used regular brown fleece for the interfacing and added brown piping around the edges.

next on the project list, i'm altering a couple dresses for a friend and decided i wanted a new denim skirt so i'm going to upcycle some jeans to make one!

Thursday, February 9, 2012

Pettiskirt Time

so for my latest project, i decided i wanted a pettiskirt to go under my circle skirts sometimes.  of course i looked at different websites, considering purchasing one, but, heavens to betsey!, they can get pricey.  so i did some research on pettiskirt, aka crinoline, tutorials.  the most helpful one i found is from this little site: http://sugardale.blogspot.com/2008/08/how-to-make-petticoat.html  she does a wonderful job of explaining everything!  i followed her tut for doing my layers, using my measurements, then i tweaked it a little by adding a satin piece for the top of mine.  to add the satin waist piece i subtracted the length i wanted it to be from the total length i wanted the pettiskirt to be.  i also didn't add the ribon pieces over the seams of each layer.  so you'll have a better idea, here is how i did my version.

i placed right sides together for my tulle, so i ended up with a regular seam, instead of a flat one.  i will say too, that it is kind of a pain having to gather the fabric to fit the length of the next tier...but i made it!  i also added a ribbon trim to the edge.  i used regular ribbon, which means i had to fold the ribbon in half as it was going through the machine to create the bias tape edge.  i'm kicking my self though, b/c i was going to buy some satin quilt binding and cut it in half then use those pices for the edge, and i should have b/c it would have given me enough for the edge. *note: if you buy ribbon, get 2 spools!
 
next for the waist piece, i cut two pieces at the measurements i wanted the piece to be and sewed the pieces together along the sides.  i then folded the top down to make a case for the elastic to go into.  sew this closed, but as you get back to your starting point leave an open section.  this is where i fed my elastic through, and once i had both ends of the elastic out i sewed them together to tuck back into the casing.  then sew it shut!

then, voila!, i have my pettiskirt!!  while it's not perfect, i am pretty stoked that it turned out this well, especially since this was the first time i've ever made one and the first time i've ever sewn with tulle and satin.  below i've added pics of circle skirts i've made with and without the addition of the pettiskirt.


this is 1/4 circle skirt.  if i do wear a pettiskirt with this one, which chances are i won't b/c it doesn't really need the extra umph, i would make a slimmer one. 


 this is 1/2 circle skirt.  love the  the pettiskirt gives this one!

 this a full circle skirt.  next time i wear this one i will def wear the pettiskirt.  looks a whole lot better with the extra volume!

Saturday, February 4, 2012

Purple Circle...Skirt, That Is!!

so, no surprise here, but my latest project is ...a circle skirt!  i keep making them b/c they are so easy to make and so easy to wear!  not to mention, they are cute too.  for this skirt i used some leftover stretch bengaline i had from making my purple dress.  due to the fabric the skirt has a wonderful drape, can be worn any season, and if you wear it in winter you don't have to put on a slip or add a lining.  i may just have to make more skirts using this fabric!

 
i used 2" elastic for the waistband and i did a new technique for the hem.  usually when i make my skirts from a cotton fabric, i use coordianting bias tape for the hem. for fancier fabrics like this, or corduroy or something to that effect, i fold the hem up and press, then fold it down in the crease and sew it.  not this time!  this time i first serged the raw edge then i just rolled it as it was going through the machine.
gah, so much easier than my usual technique!  if you decide to venture out and make a circle skirt, def try this hem technique, or the bias tape, and it will save you a headache.  now, i've decided i want to make a pettiskirt, aka crinoline, to wear with my skirts sometimes and give them a little more pizzazz.