Sunday, July 7, 2013

Banana Circle Skirt


i was in the mood for a new skirt and knew i wanted to go to my infamous style, the simple circle skirt. i went to Hancock Fabrics one day and wandered around the store for quite some time trying to find a fabric i wanted to use.  i eventually went with this awesome bright yellow twill.  you know i love my bright colors!! the actual color name on the bolt was banana!  so i got my fabric, zipper, bias tape, and yellow buttons and set out back home to begin sewing.


my original plan was to make a half circle skirt, but with the fabric being 60" wide, and then i bought 1 1/2 yds, i was able to get a full circle skirt out of it!  it was actually one whole circle, but then i did one side seam to put in the zipper.

for the waistband i did a simple rectangle longer than my waist width so it would overlap.  i then did a simple button for the closure.  i was super excited about the button because it was so cute with the little white dots detail on it!

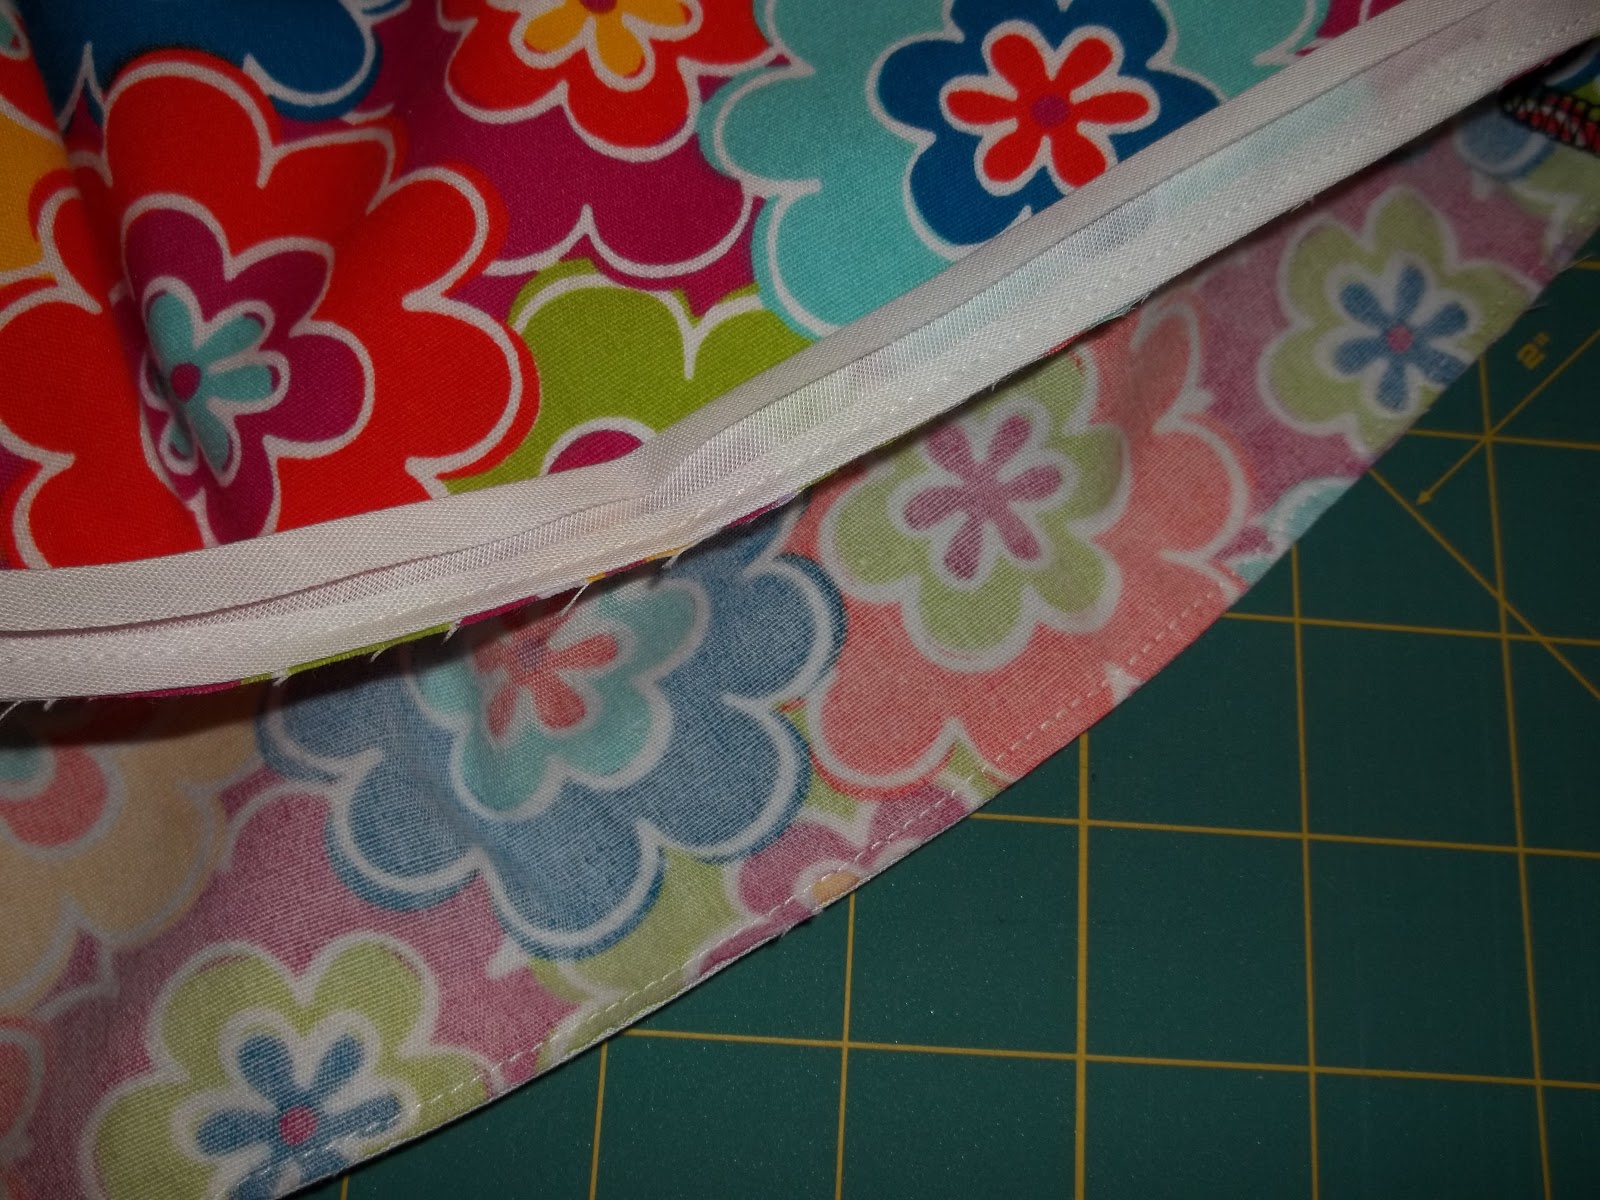
for the skirt hem, i decided to do a bias tape faced hem with yellow bias tape instead of doing narrow hem.  i only bought one package of yellow bias tape and didn't end up having enough, but luckily enough it was only a small section that lacked.  so i added some white bias tape to the open section.  also, i bought double fold bias tape instead of single fold, but worked it out by simply ironing the middle fold of the bias tape out.


once my skirt was finished i was going to just keep it the solid yellow, but decided to add another little touch and do round, pleated patch pockets.  for the pockets i did an inverted box pleat in the center and a regular pleat on either side of the box pleat.  this tutorial from guthrie & ghani was great in helping me figure out how to make the pattern for the pocket.


to attach the pockets i fanned the skirt out completely flat and measured meticulously to make sure they were even.


i also added black piping and a self-covered fabric button.  i LOVE doing fabric covered buttons!!!


even though i planned to make a 1/2 circle skirt i'm glad i did the full circle because i love how the skirt came out.  i also made it longer than what i thought i needed then cut off about 2" or  3".  this way i could be positive it wouldn't be too short.  can't wait for my next circle skirt!!


the skirt is absolutely fabulous for twirling in too!  i started taking timed pictures of me to demonstrate the great twirl ability...


...then realized i could do an action shot setting with the timer.  so no more blurry pictures!  and on to the barrage of twirling pictures.  i was having a lot of fun twirling, if you couldn't tell!


Friday, July 5, 2013

Self-drafted Shorts

now that i'm in Fashion Design school i definitely am more adventurous about my sewing and trying new projects.  this new found courage is what prompted me to want to draft my own shorts.  i took Flat Pattern 1 last semester and in that class we drafted patterns for the upper body, i.e. peasant blouse, button-down, and basic torso slopers.  when we start back in the fall, i'll be taking Flat Pattern 2.  in there we'll be drafting patterns for the lower body.  so, i've already got a head start since i drafted a pair of shorts :)  so i grabbed my school book, some wrapping paper to draft the pattern, and my drafting tools and moved full speed ahead!

once the first pattern was drafted i made up a muslin of them and tried them on.  the depth of the back crotch slop wasn't deep enough and there were fit issues across the front.  so i made the pattern alterations and whipped up the second muslin.  they fit this time!

once the pattern was complete i whipped up a pair from some leftover black fabric i had from when i made the black pleated circle skirt.  i didn't have enough fabric for the inside of the waistband, so i used some leftover lime green pique i had from the lime green Simplicity dress.  plus, it's really fun to have the slight hint of lime green!

i'm really impressed with how my shorts turned out, especially considering this was my first time using a self-drafted pattern.  next time i make some though i know to make the height of the waistband shorter and shorten the length of the zipper placement.  i will also add back pockets since i will be using a better fabric and have more of it.  all-in-all, not to bad for drafting my own pattern!  i even did a contoured waistband!


Tuesday, June 4, 2013

Remnant Tri-fold Wallet

so for a while now i've been wanting a new wallet.  i knew i wouldn't be able to find one in stores that i really liked, so i went on a hunt on Pinterest for a simple tutorial.  i knew i wanted my wallet to be full size so i wouldn't have to fold the bills up to put them in it, it needed to have a zippered pocket for coins, and have card slots.  in my research i stumbled upon this cute fabric wallet over at Color Me Domestic.  it was in her blog post i found the link for the original tutorial for the wallet over at All Wrapped Up.


here is the wallet from All Wrapped Up.  
it was exactly what i was looking for!  it fit all the criteria i was looking for, and a huge thing i liked was that the zippered coin pocket was inside the wallet instead of on the outside.  

i read through the instructions and knew it was easy enough.  the one thing that intimidated me though was that all the measurements are in centimeters.  yeah, i'm used to working in inches and even converted all the measurements to inches, but then decided to suck it up and make it in centimeters.  once i realized that reading a tape measure in centimeters wasn't rocket science i knew i could do this!

i also drew inspiration from Gen's, of Color Me Domestic, version where she added the flap extension.


i wanted my wallet to be a tri-fold, having a flap extension also, with my extension going all the way down.


to do this i cut the main pieces out at 35cm, instead of the 22cm.  with the floral fabric, there wasn't enough to get the full 35cm rectangle, so i cut it out with what i had then made up for the length by doing a lime green strip for the outside.  something happened though with the floral print with ironing once the strip was sewn in.  the heat caused it to shrink up, so that piece ended up being about 32cm.  everything worked out nonetheless, although i would've liked to have had those extra 3cm.  also note to self, i could've moved the green strip down.


for my closure i did a magnetic snap, and i found this awesome 2-pack of teal snaps at JoAnn's on sale for $0.97!!  yes, i am obsessed with using magnetic snaps after using them on my purse and realizing how easy they are to install!


to finish the wallet and close that open side where i placed the other part of the snap i hand-stitched it.  i mainly did that because i couldn't get where i needed to with my machine because the snap was in the way.


i'm loving my new wallet and am thinking of making another version!

Thursday, May 30, 2013

Shift (Dress) In Silk - New Look 6125

my mom had been wanting me to make her a dress for some time.  since school was still in it was harder to be able to do any outside sewing.  so finally i could make her her dress.  she originally wanted a solid black dress using a pretty black eyelet lace and black lining.  well, i laid the pattern pieces out on the eyelet lace and there wasn't enough.  the lady who cut it didn't know what she was doing when she cut it and gave me less than what i asked for.  it was much later after we had bought the fabric i realized this and they didn't have anymore.  so we went to JoAnn's and she found a cute patterned silk in the clearance section for $5/yd!  for the new dress she also bought a new pattern.


since my mom is short-waisted i shortened the waist of the pattern using the lines they had on there.  also, the fabric didn't need to be lined, so i took the facing pieces they had (front neck and back neck) and taped it to regular printer paper and traced around the armhole to create a facing piece that covered the neck, shoulders, and armholes.  this way i didn't need a lining and it gave the dress the stability it needed around those areas.


to finish off the hem i simply serged the edge then used the good ol' Stitch Witchery.  I knew a regular hem with a seam on the outside wouldn't look right with this silk fabric.  it was actually easier doing the hem that way too.


now i just need to get around to making her a skirt from the other fabric so it doesn't go to waste.

Feelin' Groovy - Simplicity 1609

for my latest dress i used my new favorite pattern.. as soon as i saw this pattern in an email Simplicity sent me i knew i had to buy it! hello, 1960s obsession!  so i swung by Hobby Lobby and bought it when they had their $0.99 Simplicity sale a while ago.  then came the task of finding the perfect fabric to use with the pattern.
i discovered this awesome bright floral print when my mom, my aunt, and i were shopping around in the new JoAnn they opened in KY in the small town we used to live in.  as soon as i saw it i knew it was perfect for the style of dress.


(hmm, not sure why the right picture is blurry. it def wasn't blurry in iPhoto.)
my original plan was to make the dress in the solid green view with the awesome collar.  i changed that plan when i saw this great fabric.  i knew a collar would be too much since the dress was already patterned.  my next version, though, i plan to make it with the collar.  with this pattern, i followed it to a 't'.

this pattern is very easy.  there are only four pattern pieces: back piece, front piece, back facing, and front facing.  my kind of pattern, not complicated.


when it came to the hem, i actually was able to take 3" or 4" off before hemming it.  once i cut the excess off, instead of doing a normal turned up hem, i decided to do a faced hem for the first time.  i simply took some leftover cream single fold bias tape i had an sewed it around the right side of the bottom of the dress.  once that was sewn on i pressed the bias tape down, then pressed it up against the inside of the dress so i could sew it in place.  very easy!  i am loving faced hems now!


once the dress was finished i added another little detail by sewing three white buttons on the front.  another thing i like about this pattern, is that when you sew things like buttons on it's easier because you have that front seam.

all-in-all, i really love this pattern and plan to use it quite a bit.  one change i would make though is getting the back neck to fit better.  for some reason the back neck sits out off my back.  should be an easy fix though by tweaking the back neckline darts.


after i had finished the dress i had fabric leftover and knew i couldn't just let it sit around.  so i decided to whip up a skirt.  for this skirt i used New Look 6053 i had in my pattern stash.


due to my farbic restraints i had to cut about 2"-3" off the pattern to make it fit.  since i had to cut some length off i did a faced hem using some leftover satin balnket binding i had.  i didn't have enough binding when it was folded in half, so i cut along the fold line and sewed one end of the two pieces together.  then the edge that was made by me cutting the piece apart i sewed that to the skirt bottom.  the other edge of the binding was already sealed so i was able to just sew it in place.